
The router is a device or program applications that work between two or more
of the different networks to carry data from one network to another. Routers commonly
used for connecting between
networks in a LAN (local area Netwrk),
network LAN with
WAN (Wide Arena
Network), WAN networks
with WAN or
LAN menghubngkan also
for a telecommunications service
to be able to access the public network (Internet).
Maybe some people think Router is a bridge
(bridge), but more than that a router
can filter traffic data, dividing the network into multiple sub-networks and routing to obtain
the shortest path
or also provide an alternative other links if the links are The main break or is
busy.
There are 2 kinds of routers, the router device and router software. Router device is a device or hardware that serves as a router such as Cisco Routers, Maipu, 3Com, and other The Mikrotik lian. Router Software is an application program is installed on an operating system that serves as a router for example RRAS (Routing and Remote Access), WinRoute, WinGate, WinProxy SpyGate and.
In this article the author wants to share the knowledge how to get Windows Server 2008 as a Router. In order to enable Windows Server 2008 as a router you need to install (add role) RRAS first. RRAS (Routing and Remote Access) is a network service that can serve as:
- Dialup remote access server.
- VPN (Virtual Privite Network) Server.
- Router
- NAT (Network Address Translation).
- Dial-up and VPN Demand Dial Router.
RRAS found in Windows versions 2000, 2003, 2008 and 2008. As a simple example I will create a router to connect two different networks as shown in the picture below.
- VPN (Virtual Privite Network) Server.
- Router
- NAT (Network Address Translation).
- Dial-up and VPN Demand Dial Router.
RRAS found in Windows versions 2000, 2003, 2008 and 2008. As a simple example I will create a router to connect two different networks as shown in the picture below.

Here are the steps to create
a Windows router:
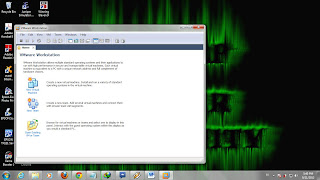
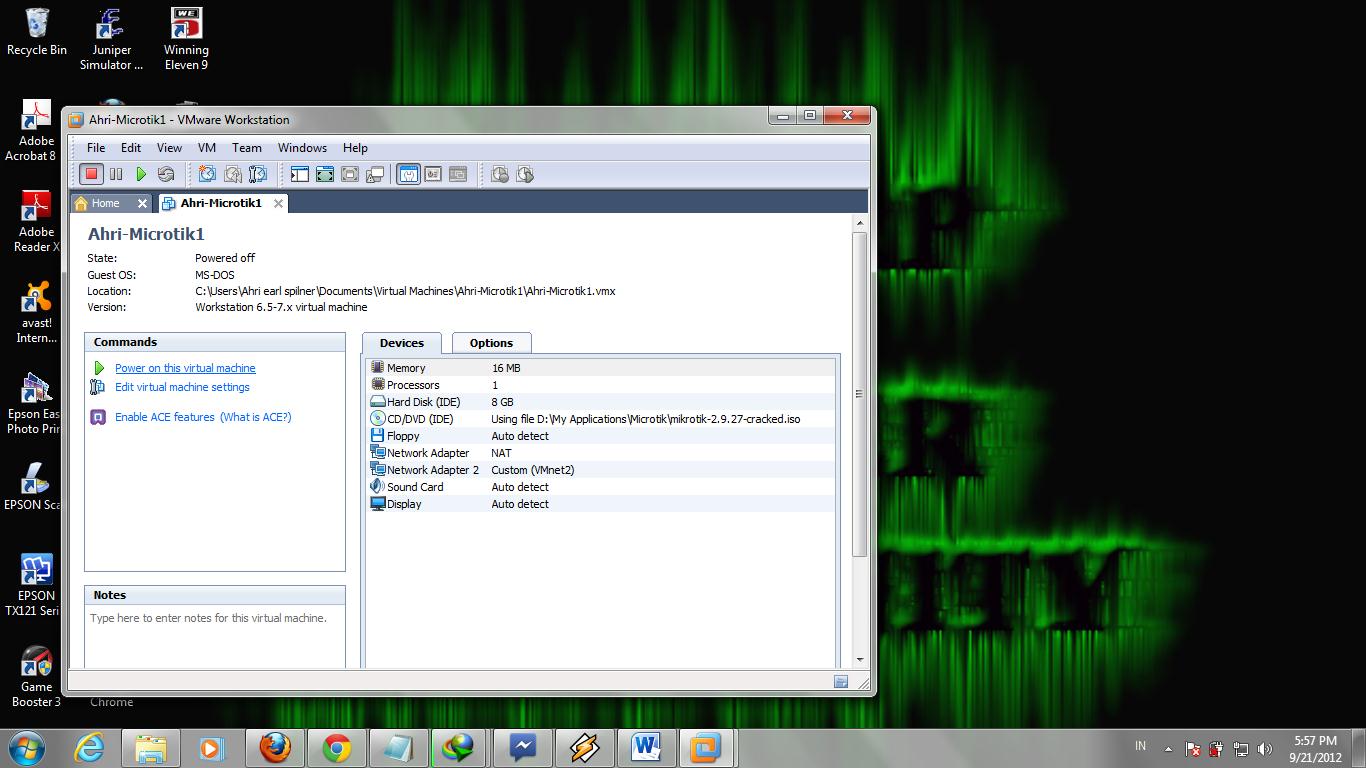
1. To perform this exercise, before Windows Server 2008 should be installed and have two NICs (Network adapters).
2. Next open Server Manager, click the Server Manager icon located on the taskbar.

3. Then
on the left menu click the Roles and select Add Roles.

4. Roles
RRAS features found on the Network Policy and Access Services, click the
Network Policy and Access Services and then click Next.

5. Introduction
window appears Network Policy and Access Services click the Next button.
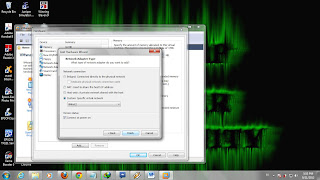
6. Since we only want to functioning as a router only, the select option Routing and Remote Access services, if you want to also enable a RADIUS server you can select the option Network Policy Server. Check the option Routing and Remote Access services (as shown below) and then click the Next button.

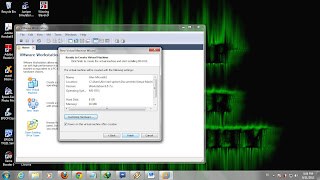
7. Confirmation
window appears and then click the Install button to complete.
8. Furthermore lo call Routing and Remote accesss from menu Start - Administrative Tools select Routing and Remote accesss.
9. Once
the window is open Routing and Remote accesss langah next step is to configure
the Routing and Remote accesss as a Router, click on the Routing and Remote accesss
- Server Status kemduian right click on the name of the server select Configure
and Enable Routing and Remote Access.

10. Welcome window appears click
the Next button.
11. Then
a window will appear Configuration, here there are many configuration options
such as VPN, NAT, VPN and NAT, Secure connection between two private networks. Since
we only want memfungiskan as a router configuration select the Custom option
and then claim the Next button.

12. Then select LAN
routing option and click the Next button.

13. Tombil summary window
appears click Finish.
14. Jendala
popup will appear automatically start the service click Start tombil Services.

15. Until here, the
installation process is complete RRAS
16. Then
you can address the Windows server (RRAS), and a computer that will be made in
the experiment as in the picture above.
ISI-Client10

Windows router (RRAS)

Chels

17. After
that, try
doing a
ping to
test:
Ping from ISI-Client10 to Chels

Ping from Chels to ISI-Client10

18. Ping has been successful outcome of the ISI-Client10 to Chels and vice versa.
19. To view the routing table can adan typing route print

Then you can
add a
few more routers to create a more complex network configuration, safe learning


